When your garage door suddenly refuses to lift, or makes a sound resembling a gunshot echoing from your garage, you are likely dealing with a compromised spring system. Garage door springs do the heavy lifting—counterbalancing the massive weight of the door panels so they can easily slide up and down.
Faced with a broken or poorly balanced system, homeowners naturally arrive at a crossroads: Should I handle this myself or call in a professional installer? Let's break down the realities of spring physics, safety, and when it is smart to delegate the job.
The Mechanics of Risk: Why Springs Are Unique
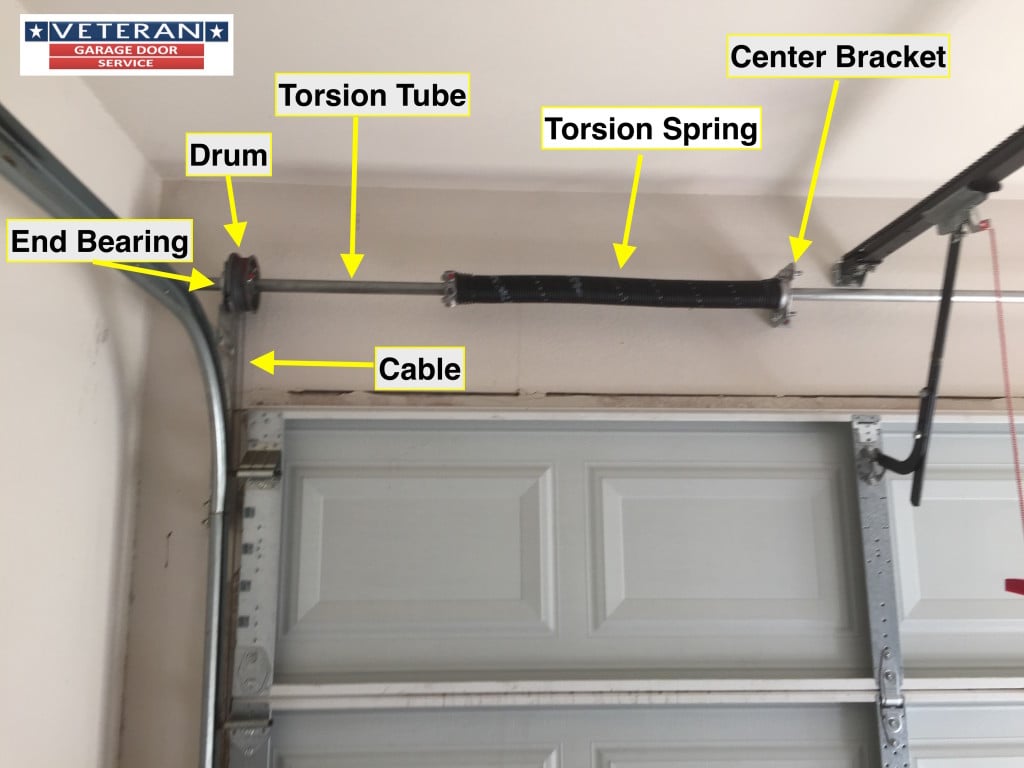
Unlike replacing a rusty hinge or realigning a photo-eye sensor, working on garage door springs means interacting with massive amounts of stored mechanical energy. Torsion springs sit on a steel shaft above your door and wind up tightly under immense force to support doors that regularly weigh anywhere from 150 to over 350 pounds.
When DIY is Possible (With Strict Conditions)
Taking on a spring adjustment or replacement yourself is only advisable if you possess intermediate mechanical aptitude, can methodically follow multi-step safety checklists, and have the exact dedicated tools required. Never attempt to adapt makeshift tools like screwdrivers or rebar to adjust a torsion cone.
If you have determined that your skills match the task, you absolutely must purchase purpose-built hardware designed specifically to survive the mechanical stress:
Standard screwdrivers or pipe wrenches will slip inside the winding cone. These heavy-duty steel winding bars are precisely engineered to fit standard 1/2-inch cones safely, minimizing the hazard of a sudden recoil slip.
View Winding Bars Now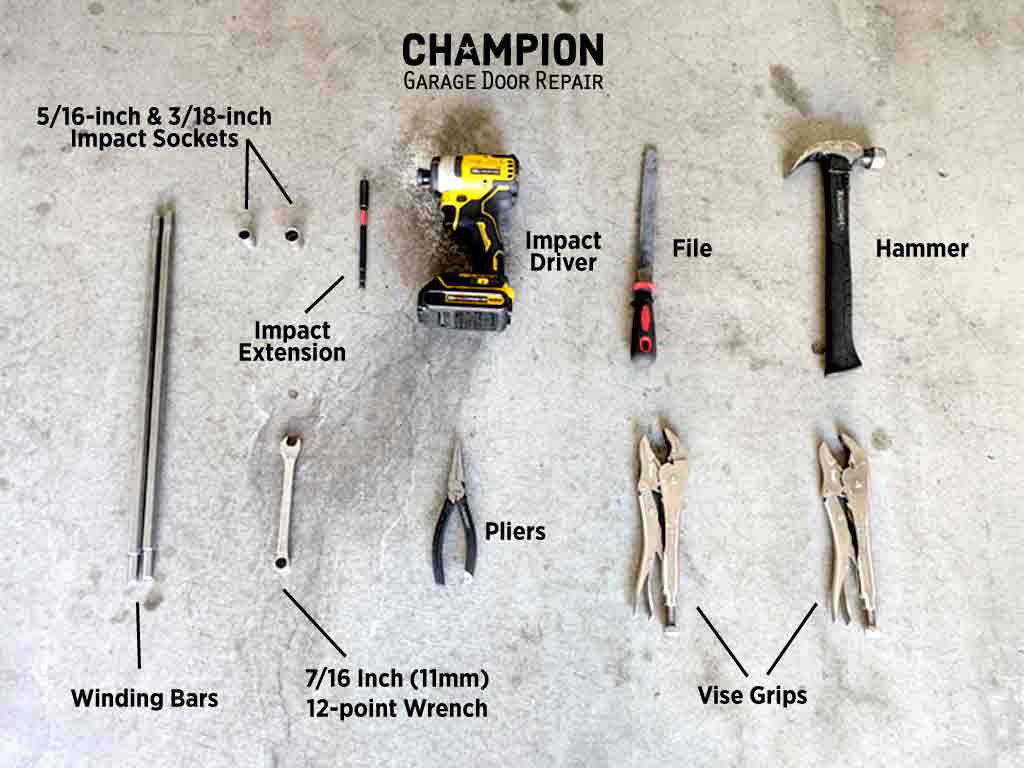
If you are replacing a fully broken spring, always verify your exact wire gauge, inner diameter, and overall length before ordering. Upgrading to high-cycle springs can significantly lengthen the lifespan of your setup.
View Replacement Springs NowThe Comparison: DIY vs. Professional Intervention
To help balance your budget against your personal safety margins, consider this direct breakdown of how the two paths stack up:
| Factor | DIY Route | Professional Repair |
|---|---|---|
| Financial Cost | Low (Cost of parts and tools only) | Moderate to High (Parts + labor fees) |
| Safety Hazard | Extremely High (Risk of severe impact injuries) | Zero Risk to Homeowner |
| Time Required | 2 to 5 Hours (Including research and parsing specs) | 30 to 60 Minutes |
| Warranty Protection | None (Parts warranty only, no labor protection) | Typically includes a 1-5 year labor and parts warranty |
When to Absolutely Call the Pros
Save yourself the emergency room trip or the headache of a warped garage door frame by calling a trained field technician if any of the following apply:
- The spring is completely snapped: If you see a clear gap split down the middle of the steel coil, the spring is dead and must be un-tensioned and extracted perfectly.
- Your door uses a dual-spring setup: If one spring breaks, the other is usually on the verge of failing too. Balancing dual systems requires precise symmetry.
- You lack the proper safety gear: If you do not own robust safety glasses, locking vise grips, and solid leather gloves, wait until you are fully prepared or call a professional shop.
The Final Verdict: While tightening loose hardware or swapping out worn rollers makes for an excellent weekend DIY project, garage door spring adjustments are best left to professionals unless you have the exact right safety gear, specialized tools, and absolute confidence in your mechanical workflow.